Wednesday, 6 July 2016

Quick Fix Tote

On one of the University interview day trips, Emma was given a 'lucky bag' with little useful bits in which were obviously lost in the mire of despair we call her bedroom floor.  However, after nearly a year and the bag finding no further use than floor 'art', I rescued and then repurposed it.

I measured up the bag and cut two pieces of material (from my hoard stash) for a front and back.  I sewed up both sides and bottom of this material to make a 'cover' and then set to work...

Removing the straps from the lucky bag, I pinned them onto the new cover in the same position - 4" from the side.  I placed the lucky bag into the cover, right sides together, then sewed around the top, leaving a gap between the straps to use to turn the bag inside out.

Once this was done and turned, I top sewed around the top and then ironed the bag.  It was at this point I had to 'fess up to Emma and tell her I had 'reallocated' her bag.  She liked the result was no foul! lol  However, if she still wishes to use the bag to advertise the University it came from, she can as the bag is reversible.

Here it is and a real quick and easy project to fill a rather boring couple of hours.  

Saturday, 11 June 2016

Quilts'R'Us

Well, here I go again.... 

A couple of years ago on a shopping trip with my two daughters, Emma and Vicky, Vic saw a quilt in a department store and stated that she really liked it.  It was a quilt made up of squares of grey and black material - not sure what the material was.  I (stupidly) said that if she wanted one I could make her one and she instantly jumped at the offer.

Well two years later I have now completed it!

I have a favourite charity shop where the clothes are cheap so knowing that you get more material for your money in larger clothes, I began collecting men's XL shirts in black, grey, plaid (grey/white/black) and added an accent colour of turquoise.  Her bedroom has a turquoise coloured carpet so I thought the accented colour would look ok.  When I was ready, and psyched up, I began disassembling the shirts.

When I was looking into making quilts all those years ago I found one which had been made by sewing strips of material then recutting the strips into strips again so that you ended up with a strip of squares already done.

This seemed an easier option that cutting 4 inch individual squares and sewing them together so I decided that this was how I was going to do this one.
The shirt pieces were cut into 4 inch strips then pieced into piles of 6 colours.  These strips were then sewn together and finally cut into strips of squares. 

Having measured the size of the bed I needed 28 strips of 24 squares!  Phew.  As space is getting a little rare in my sewing room, I found that I could keep the strips on an airer I had.  This also helped me ‘shuffle’ the strips of squares so that I would eventually end up with a random order of colours.  I thought that as the strips were shuffled to start with and then again put together in no particular order, that the randomness of the colours would make it easy to put strips together where no squares of the same colour would meet.  How wrong could I be?

Note     Yes, I know I have been spectacularly wrong in the past, but didn’t think that this would be another example!
So now I had all 24 strips of 28 squares done, I started putting them together checking that there were no matching squares together.  This proved difficult, as I said, but fortunately not very often.

The pattern was random after all so I didn’t think that a few matching squares would matter that much.  Eventually I had a side done.

Knowing that I would now have to find a backing material I went on the hunt for something suitable.  The only flannel/fleece I had was navy blue and I knew that this wasn’t good enough – wrong colour.  I hadn’t been able to find piece of  black flannel or anything appropriate so I went back to the drawing board.

Checking my hoard stock of material, I realised that I still had quite a few shirts left.  That’s when I decided that I would start all over again and make another ‘sheet’ of squares.  There were a few shirts used on the front which I had no material left from so the front and back are not going to be exactly the same – not a problem.

So a few days later both the front and back were done and I had already found a lovely, soft blanket – from my favourite charity shop – so all I needed to do was put the whole thing together and sew it.

The weather was beautiful.  I put a sheet on the lawn then laid out the blanket.  I had decided that I would sew all the pieces together – blanket, front right side up, back right side down – then I could turn it all inside out.  This would alleviate the need to bind the edge (hate that job!!).

Well, ha ha!  As you see from the photo, the blanket was not long enough and too wide!  As the blanket was for a double bed and the quilt I was making was for a double bed, it never occurred to me to check the size.  The air was blue for a while whilst I reorganised my thoughts.  I took the quilt front upstairs and checked the size with the bed.  Again, no surprises for what I found….  Yep, the quilt was bigger than I had measured for. 

I had measured from the bottom of the pillow a few inches over the bottom and cross ways adding a few inches so it would hang over the sides too.  I worked out that I would need 672 (!!) 3½ inch squares – 28 strips of 24.  Turns out I could have just done with 26 strips.  So the blanket was big enough but I would have to trim it down along with the quilt.  Happier, I returned to the garden and finished the pinning – with safety pins!! Lol

Although I had used the electric – yes, electric – sewing machine for making the front and back, I knew that it wouldn’t be able to cope with the thickness of the blanket on top of the front and back of the quilt so Lucy was primed ready for a full day.

I cleared everything out of harm’s way and set about it.  Lucy coped admirably!  Slowly but surely, I sewed three and half sides so I could then turn the whole quilt inside out so all the right sides were on the outside.  Once this was done, I then set about top stitching around all sides, taking care to sew up the turning bit first.  Too much for one day – being in the same position for more than 6 hours (I kid you not!! Putting more hours in sewing than working… lol!)  So the quilt was packed away and Lucy put to one side, exhausted!

Hubby works on a Saturday morning so out it all came and I have now just finished sewing a couple of squares on each side a few squares in just to hold the blanket secure and not relying just on the topstitching.  I am really pleased with the result.  However it will be a long, long time before I make another quilt.  Unfortunately I still have Emma’s cushion covers to make out of the remnants of the quilt but I think I can cope with that.  Watch this space……    J

Note   No, I haven't messed up the photo - I photographed it 'skew-wiff so you can see the front and back together!


Sunday, 17 April 2016

Bear Necessities

I am currently working on an order (!), yes, someone is actually going to buy something I have made! Up to now, my projects have been 'trier-outs' to see a) if I could make them and b) if they were any good. As a result they have been presented as gifts - whether the recipients wanted them or not! lol So far the bags I have made have been well received - mainly by my Aunt who you could argue is slightly bias, but would say if she didn't like something so I guess they've been ok.

I have also made a few soft toys - see previous posts - of which most are still adorning the shelves in my office (along with sooooo much other stuff) but I have sold one Nelly, so again, result!

I came across a pattern for a teddy bear - http://www.howjoyful.com/2010/05/howjoyful-bear-tutorial-and-pattern/ - and thought it would make a good new project and challenge so that became the project I would do inbetween doing the hexie quilt (see previous post)


From our exclusive boutique I found a fleece onesie with a small heart design on it - perfect for my project;  cheap which is a bonus and big - even better just in case.....

My first task was to deconstruct it to make the most from the fabric. There was loads!!!  Check it out below....

So now I had the bits, the tedious cutting out of the pattern could begin.  I really, really hate this part. If I could pay someone to do this for me I would.  I hate it because if I'm going to make a mistake, this is where the plan goes pear shaped.  If I can get the cutting right, I'm usually in a good place for the sewing.  More than one mistake on the cutting and I might just as well pack up for the day!

Anyhoo, this time it went ok.  Not sure if it was because it was a new pattern or because I was really looking forward to doing some 'proper' sewing, I don't know but the cutting was ok and I even marked up all the pieces and put them in piles.  Once the scraps were cleared away, I set my stall out..

Coffee, DVD, Ironing board (I decided that the fleece was a little flimsy so was going to add a thin facing to the main pieces) and, of course, Lucy.

I followed the pattern for most of the time but it was a little sketchy in the middle so using the brain cell I have along with the photos, I managed to cobble together two, not bad teddy bears.  Don't look too close at the red one as I think I may have put her legs on the wrong way - i.e. left leg on the right side and vice versa.  However, first time sewing fleece - no major problems and the facing helped; first time teddy bear.  Not bad!  Take a look and see what you think.

The finished bear is quite tall so I might scale down the pattern if I decide - or am asked - to make any more.  Needless to say, there weren't many bits left over.

So the order I am currently getting psyched up for is for two panda bear toys.  I have already made one for a friend who then showed it to a friend who has asked for them.  Not having a pattern for a panda and not being able to find one anywhere online - I dare say there are some but not being tech-savvy, it would have taken too long to find.  So my one brain cell was put to work and using the teddy bear pattern and looking at lots of photographs of pandas I managed to work out where I could manipulate the fabric I was using to make the plain back of the teddy bear into a black and white mix.

I could just have sewn a strip of black to a strip of white to give the two tone back the distinctive markings but pandas don't have straight lines.  I know it is only a teddy bear but in my mind that would have been too easy and - for those of you who have read my previous posts and those who haven't but know me anyway - you will know that I always do things the hard way first and then find the easier route.  This being the first panda was going to be right no matter what then we would see.

So the bits of fabric were cut - black from an old pair of corduroy jeans for texture and white from a baby's blanket.  (I admit these were new ones but I didn't have any white in my stash only corduroy and I felt that wasn't right).  I know, I know, two very different fabrics again but I was able to level the field by adding some facing (again) to the softer material of the blanket.  The stretch on the corduroy didn't pose a problem either due to how I cut it.  There is still a little give but this helps give the panda some extra character.

As I was adding facing to the fabric I needed the ironing board handy so the office was reconfigured to be able to accommodate this as well - cosy!  Eldest daughter just 'eye-rolled' and laughed as she tried to move past giving up and going into the kitchen the other way - lol.

Not sure if you can see clearly on the desk but you might just be able to make out the right side of the back piece in the black and white pieces.  They are sewn together in a curve so the black piece ends underneath the arm of the panda.

As I had faffed about with the four pieces for the back - resulting in 8 pieces in total being sewn because I couldn't quite get my head around the opposite cut for the other side (again not the sharpest needle in the box!) - I did have to have a lay down in a darkened room for a while.  However, once the brain cell had recovered sufficiently, the rest of the 'build' went spectacularly!  The mix of the two fabrics worked brilliantly and were a dream to sew.  Michelle is really happy with her panda and as I mentioned, I have an order for two more. Happy day  :)

Saturday, 16 April 2016

Glutten for Punishment

Well for some strange reason I decided that I should return to basics for a while and I started another quilt!  I know, I know.  After the denim one and the pledge that I wouldn't make another one, I must have had a brain storm or mental break and I started another one only this time it was going to be hand sewn and using hexies.

Like I said in the title - glutton for punishment.  Anyhoo, having decided on the size of the pieces, I rallied round looking for thick card and/or thick paper as I knew that the templates were going to get some hammer and would need to last me a while.  The laborious task of cutting out the pieces was a trial but something I could do watching TV or in the car on the way to wherever our walk started.

I thought that I would make it the same size as the denim one - a little bigger than a single but not as big as a double.  I was able to find a piece of suitable wadding at a local market and as there was quite a reasonable dirty mark on the edging of the piece, it was relatively quite cheap - result!

I have made doilies, covers, cushions using hexies before - see previous posts - and only one as big as the one I wanted to make now. ( I am unsure as to the whereabouts of this quilt but have a sneaky feeling we lost it in the various moves when we were flooded out).

As you will know (from previous posts) I am a fabric hoarder and so the search for suitable fabric wasn't hard and didn't take long.  I used a piece of squared paper to try out various patterns and finally settled on one I was happy with and used a variety of different fabrics and colours.  I love the feel of different textures so I mix cotton fabric with upholstery material with denim and corduroy. I know this is not quite the done thing and takes more work to ensure that edges are secure and won't fray but I think it is well worth it.  Whenever I could I made up batches of coloured hexies (for the flowers) and various green hexies for the 'background'.

Anyhoo, once I had a bucket full of hexies, I started by making a long chain of different coloured green fabric hexies to make my outside edge and set the length of the quilt.  This was quite a quick process as only one side of the pieces was being joined.  The second row was more difficult as I wanted to start bringing in the coloured 'flowers' and needed to work out where the coloured pieces needed to go.  DOH!  Head slap moment!  I realised then that I could be more accurate with this process if I made the flowers up first and added them as I went along adding single green hexies inbetween the flowers to make up the pattern.

I know, I know not the sharpest needle in the box!  LOL  This process was even better as I could make up batches of coloured hexies, sew them together to make the flowers and then play with them in the design as I went along.  The hexie flowers could be made as and when and gave me such a sense of achievement as the single hexie sewing was slow and you couldn't really see the pattern or the project getting on.  However, adding full flowers and then single green pieces to bond them together made progress quicker.

I started to put hexies together to make a full flower and made up batches of these.  I also made up batches of green fabric hexies to make up full green flowers which I could also use to fill the bigger spaces between the coloured ones.  Once I had a batch of ten flowers, they were sewn together and placed in a separate 'bucket', when this one was full, I worked out which flower needed to go where and then proceeded to adding them to the quilt.


So, the nights were drawing in, the hockey season was under way and my eldest daughter, Emma, was going to be visiting lots of Universities in the search to find one that ran the course she wanted so lots of Saturday nights to myself and lots of travel and waiting around in which to use to sew hexies. (Right:  hexies being sewn whilst waiting at Nottingham University).


Slow going as I was hand sewing and the different fabrics didn't make for easy sewing either!  Stiff fingers from the effort of holding a little needle and pulling it through tough fabric - I have fingers like pork sausages!! - and blisters on the ends meant that I couldn't sew as often as I had hoped hence it taking seven months from start to finish, but I think it's pretty spectacular (even though I do say so myself, lol).

So, eventually the front of the quilt was done and a decision needed on how I wanted to finish it. Having made and sewn my own binding on the denim one, I really didn't want to do this again so I trawled the t'internet for alternative ideas and found a method of finishing a hexi piece without having to square off the edge. This meant that I could keep the 'stepped edge' of the pieces in the final quilt - great.  Little realising what this would actually involve.  Check out http://badskirt.blogspot.co.uk/2010/05/tutorial-finishing-you-hexie-quilts.html

The search was then on for something to back the quilt with.  I already had the wadding - this had to be cut and pieced as the piece I had wasn't long enough but was too wide.  I didn't want to have to change the shape of my finished quilt front so was quite happy to do this.  The end result was ok and does not show up on the finished piece.

Fortunately my Aunt came to the rescue when I wasn't able to find some fleece or flannel I liked.  She found me a light green, flannel, double, fitted sheet.  I opened the seams on the corners and laid out the sheet, the wadding and the quilt front to make sure they were all about the right size.  B**ger! Yep, the sheet was too small.  Something of a penchant of mine when it comes to sizing quilts! (see First Quilt (proper) part 4).

Once I had calmed down, I relooked at the sheet and worked out that with the first row of green hexies on the back along with a few additional ones in the corners, I could use the sheet.  I made up some more templates, added the green edging hexies to the back of the last row of hexies and added flowers to the corners.  I then relaid the quilt front, wadding and flannel sheet - Success!

The next step was to pin, pin, pin, pin!!!!  Again using the lessons learned from the denim quilt with the pins - (First Quilt (proper) part 7) - I used safety pins in the centre to secure the three layers together and began taking out the templates from the edging hexies.  I reused the thread to secure these to the flannel sheet.  The mammoth job of sewing each hexie to the backing could then begin.

It took the best part of two days to complete.  I made sure that the stitches went from the front to the back and caught the edge of the backing hexies but ensuring that the stitch on the front of the quilt was placed 'in the ditch' of the corresponding hexie.  Hopefully this has resulted in the stitches being virtually invisible.  More blisters and stiff fingers later the quilt was done.

I wasn't fully satisfied that the edging stitches would completely hold the quilt together and so decided that I would, again like the denim one, pick out individual flowers and sew around the outside edge at different points on the quilt.  As it is quite heavy, I felt that this would reduce the strain on the stitches on the edging and also pull the quilt together in the centre.

With a full day to myself, I made a pot of coffee, cleared and cleaned my desk, moved everything within a metre radius (this was a feat in itself if you've ever seen my office!!), set up my Castle DVD, and then threaded Lucy (see Introduction post).

When the coffee tasted awful and I couldn't sew the quilt !!!!! I should have given up then!  It just wasn't happening.  I know Lucy can cope with anything I throw at her and this was not as heavy as the denim one but first the needle broke then the thread and the material was being pulled out of whack so I packed up and sulked!

When I felt a little better, I retried, only this time I tried hand sewing the edges.  I set myself up (again) and started sewing.  Worse!!!  Because there are no 'guides' on the plain flannel backing, I couldn't work out the shapes of the hexies.  I tried several times pinning the flannel to the front and carefully following the 'ditch' of a hexie - fail!  I have now given up on this idea and have folded up the quilt until I feel less frustrated.

I think I will try marking out the shape of a single hexi plotting the corners and feintly drawing a guide line and seeing how that works out.  If successful,  I will pick out random flowers and some single hexies over the whole quilt.  I am feeling more positive about this approach and will, obviously, update my blog with the results.  For now, here are photos of the quilt front and back. Check out the edge!   ;)


Thursday, 8 October 2015

Roses are Red.......

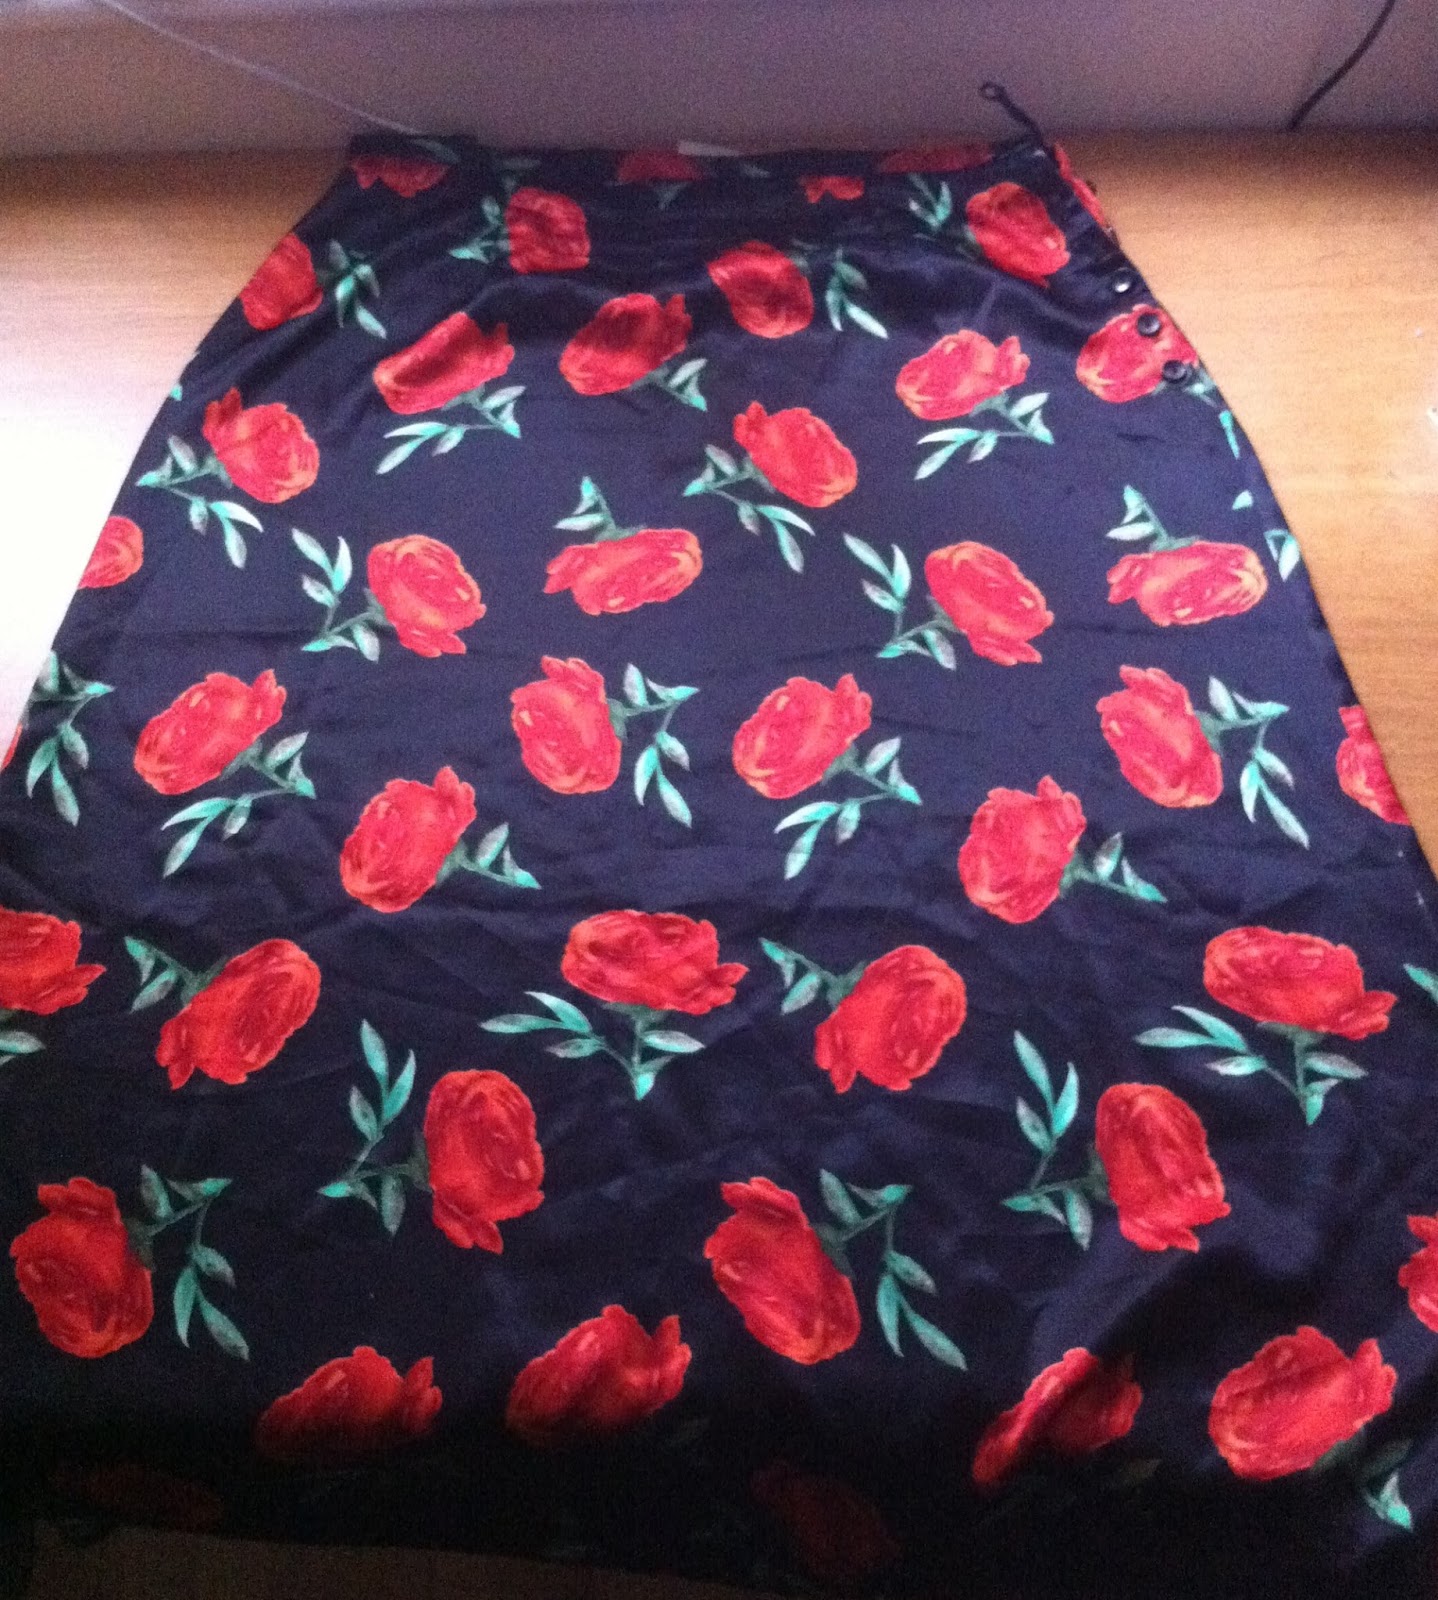
For a couple of weeks now, in our 'exclusive boutique', there had been a black silky skirt with large red roses on it.  It was (fortunately) a size too small (cough, cough) and really not my 'thing' at all - although those who know me would say that black and red are definitely my thing!!!

Anyhoo, I kept looking at this skirt - mainly 'cos it's colouring made you look, i.e. you couldn't really miss it - and the cogs started going around in my head about what I might be able to upcycle it into.... So last week, before we went in, I made the decision that if it was still there, I would buy it.  I was fed up of seeing it on the racking!

So having had to endure the sarcastic wit of the the guy in the shop - he takes the mickey out of me every week!! - I made my way to the back of the shop and yep, there it was, still there.  I removed the item from the racking, double checked that there were no pulls or tears in it and 'bagged' it.

Enduring more sarcastic comments from the guy somewhere along the lines of "had I made sure it was my size.....?   did I want a hat and bag to go with the outfit.....?  it would look lovely with the pink feather boa he had in the back of the shop......" etc., etc., after giving him my £1, I made my escape and brought the skirt home.  I washed it then when it was dry hung it up in my sewing room (ex office), and again pondered on what I could upcycle the skirt as.

Over the week I measured the panels - 3 in all - and realised that I could make a vest top as long as I didn't mind two side seams (as per normal) but an added one up the back - not too bad but the pattern was very strong and I really didn't think I could carry off the finished article especially given that it was a very, very bold pattern and that ladies of a (cough, cough) soon to be certain age shouldn't wear sleeveless tops.

Therefore it should come as no surprise but I made a shopping bag out of it and the left overs will made one of the soft toy patterns I have just bought as well as possibly making it into the currently being worked on 'hexi-quilt'.

  • Note.   Yes, I know I said I wouldn't be doing another one this side of hell freezing over following the dramas with the denim one, but I should be safe here - I am hand sewing for goodness sake!). This new quilt is currently being hand-sewn as the nights are drawing in and I can make the hexies watching the TV.  I will obviously post later about this particular project when I have sufficient done.
I have made quite a range of shopping and tote bags so the making up of one now comes quite easily. I had to play around with the back side of the bag as the front skirt panel wasn't quite big enough to make the two panels I needed.  I pieced the back panel and also the handles but, if I do say so myself, the handles have worked out pretty well..... not so sure about the matching up of the pattern on the back panel but I knew this was going to be a pain in the ***e.  The finished result is great and I am pleased with it.

Just to be different, I have made a cover for the bag, you know like the one you get on an umbrella?  I know I shall probably lose it and so I am now going to try to see if I can somehow attach the cover to the bag.  Maybe make a pocket that you can fold your bag into......... I know I have a Kagool somewhere that you can do that with............ just got to think on where it is......

Here is the finished result..... a bit in your face isn't it?  Yes, but no one else will have one like it and I definitely won't lose it.

See you soon...  :0)

Wednesday, 7 October 2015

Dino (part 2)

Well I rejigged the pattern I had made and made the neck a little more vertical.  I searched my stash(es) of material to see if I had any blue material - not something I was aware of as most of my material is old curtaining, pieces of end of roll, bits picked up at rando and blue isn't a colour I go for.

Anyhoo, I happened upon a piece of cotton that I found in a basket of off-cuts which had white spots on and it coincidentally was the right size for the pattern - yeah I know right?  Everything happens for a reason.

I didn't think that the cotton would be strong enough to be man-handled as I thought the toy would be so I continued on and managed to find a piece of lining cotton.  Pieces of felt were also brought out and compared until I had the right colour - red - for the scales, feet pads and eyes.  All done, I set about cutting and sewing.

I doubled up on each of the body pieces - two spotted front and back, two lining pieces to match - I wanted to be doubly sure that he was strong enough to put up a fight with a 7 year old.  As you can see I corrected the shape of the neck to make him stand taller rather than look as if he was eating off the floor, then it struck me, I could have used my giraffe pattern! DOH!! Anyhoo it was too late by then and I was pleased with my solo effort so no harm done.

The felt was a real pain to sew with!  I hadn't used it before and the fibres kept getting caught in my needle.  Fortunately, as I was using Lucy (my hand-crank), I was able to stop and start lots of times to clear the clog but eventually (and with a few more coppers in my swear box), the toy was done.
When I stuffed him I tried to make sure that it was done evenly and tight in the neck again to help make it stand up.

To be a little different, I trawled the t'interweb and was able to find a small teddy growler.  This is a small cylinder which, when tipped to one side, growls.  I remember a lady made me a large teddy bear with one of these inside when I was little and I loved it.  I thought the little lad would and also it would be 'different'.  It came a couple of days later and I was able to put it into the tummy before I finished the stitching.  

I love my Dino!  The finish is clean, the stuffing was smooth and the material suited the project.  The only think I wasn't happy with was the growler.  It worked intermittently and it was a little on the quiet side - not that I wanted to frighten the little guy, but I wanted more of a roar than a meow. 

Anyhoo, I loved it and apparently when the little lad received it, he never let it out of his sight all day!! I would call that a result.
See you soon  :0)

Monday, 22 June 2015

My Brachidiplodocaurus Dinosaur

Following the success of Gerry, my giraffe (see previous post), I was asked if I would be able to make a dinosaur........?  Thinking I might possibly be able to find a pattern, I set about looking for one. Unfortunately I didn't much like the free ones I found so wondered if I could make one by simply combining my Nelly and Gerry patterns.............. (did I say simply?? oh dear!!!)

With a little selotape and a lot of imagination, I tweaked and twisted and finally came up with a pattern I thought I could make up.  As it turns out mine looks like a mixture of Brachiosaurus and Diplodocus dinosaurs: characteristics from one are mixed with the characteristics of the other - totally unintentional but quite cool....

Anyhoo, as readers will know, I always make a trial product up so that any tweaks to the pattern can be made enabling me to correct anything along the way or add notes to the instructions so that any subsequent makes, go smoothly and with fewer - if any - mistakes.

I found a piece of flannelet which I then cut out using my pattern and, due to the texture of the material, used my pinking shears 'just to be safe'.  Not entirely satisfied with the size of the discs for the 'paws', I cut three different sizes.  I will use the larger of the three in the first attempt and will probably tack them in by hand so that if they are the wrong size, I can easily remove and replace them with one of the other sizes.

First I worked out where I wanted the eyes to be.  As I hadn't asked the age of the person I was making my dinosaur  for and googly eyes are not something that I keep a stock of, I decided that I could save any risk of him swallowing a button by sewing an eye on which was made out of the same material I was going to use for the 'paws'.

Using my large stock of buttons to find a size which worked, I traced the outline of the eye onto the pattern which I then cut out.  I then marked the wrong side of material with the shape of the eye and then used the same button to cut out the shape from the material I was going to use.

To keep the material in place whilst I sewed it on - too small for pins and fiddly for my huge fingers - I sprayed a small amount of Gunold® KK100 (fabric adhesive) to the eyes which I then fixed permanently using a small running stitch on my machine as close to the edge of the felt as I could.

I then pinned the leg pieces to the main body, right sides together. Then sewed down the back of the legs, the in between bit and front of legs of one side, right sides together.  I remembered when I had made the elephant that the 'paw pad' circles were sewn on after the leg pieces had been sewn together so I followed the same procedure here.

I checked that all the seams had been closed securely and then began 'fighting' with the 'paws' to get them into position on the end of the legs.

The larger of my felt circles were too big so I unpicked the tacks and tried the middle sized ones.  These were great and so all four were added to the bodies I had just sewn.  These were sewn on with the leg material to the top of the two pieces under the foot of the machine and the felt pads on the bottom.  Slowly but surely is definitely the motto here!


The body was beginning to look something like!


I asked if it was alright to add bits onto my dinosaur which weren't on the 'original'.  Apparently the young guy I was making the toy for has ADHD so I didn't really want to do something which could affect him.  I was informed that this would be ok, so I cut out some scales for the dinosaur's back.  I cut two lots as I had done for the paws and eyes so that I could compare colours and see which I liked best.

The dark green felt I had chosen for the paws, also looked good as the scales so I decided to use these.

Both pieces of felt were sewn together, giving the felt a little more body and stability.  At first the machine did not like the felt - see picture right - but with a little tweaking of the tension and stitch length, I managed to get it done

The scales were then pinned to the right side of the neck of one of the body pieces with the scales facing down.

This done, I started to assemble the dinosaur proper.

The first part is to sew the tummy bits together, remembering to leave a gap so that you can stuff the animal once it is finished.  I have learnt from the two Nellies I have made that to ensure the seam doesn't come undone or rip whilst you are stuffing, double back a couple of times on the start and finish of the two seams either side of the gap.

The legs need to be pinned out of the way of where the seam is going.  Pin them up on the wrong side of the body pieces so that you can sew the seam on the belly correctly.  When you are ready to sew, pin the body, right sides together and sew the belly ensuring that you don't catch the folded area in the seam.

I then rearranged the body and pinned it together ready for the final push.  The sewing was quite easy but when I came to turn him inside out, I realised that I hadn't left myself a lot of room for stuffing. There were also some places along the tail where the seam was coming undone.

I turned him back inside out and used a small zigzag stitch in the places where the original seam was a little too close to the edge of the materials and had come undone.  He was then turned back the right way and stuffed.
I am quite pleased with my first attempt and it is the first thing I have made without a pattern.

I can see now that the neck needs to be lifted on the pattern and needs to be smoother between the body and the neck - i.e. straighter without the dip.

I also need to make sure that the seam allowance is the same all the way around - the tail is a little lumpy.

All in all, not a bad first attempt and he will take his place on my recently culled bookshelves.  I now need to find some plain blue material and contrasting one for the paws, eyes and scales.  Watch this space - coming to a blog near you..............  :0)