With a little selotape and a lot of imagination, I tweaked and twisted and finally came up with a pattern I thought I could make up. As it turns out mine looks like a mixture of Brachiosaurus and Diplodocus dinosaurs: characteristics from one are mixed with the characteristics of the other - totally unintentional but quite cool....
Anyhoo, as readers will know, I always make a trial product up so that any tweaks to the pattern can be made enabling me to correct anything along the way or add notes to the instructions so that any subsequent makes, go smoothly and with fewer - if any - mistakes.
 I found a piece of flannelet which I then cut out using my pattern and, due to the texture of the material, used my pinking shears 'just to be safe'. Not entirely satisfied with the size of the discs for the 'paws', I cut three different sizes. I will use the larger of the three in the first attempt and will probably tack them in by hand so that if they are the wrong size, I can easily remove and replace them with one of the other sizes.
First I worked out where I wanted the eyes to be. As I hadn't asked the age of the person I was making my dinosaur for and googly eyes are not something that I keep a stock of, I decided that I could save any risk of him swallowing a button by sewing an eye on which was made out of the same material I was going to use for the 'paws'.
 Using my large stock of buttons to find a size which worked, I traced the outline of the eye onto the pattern which I then cut out. I then marked the wrong side of material with the shape of the eye and then used the same button to cut out the shape from the material I was going to use.
To keep the material in place whilst I sewed it on - too small for pins and fiddly for my huge fingers - I sprayed a small amount of Gunold® KK100 (fabric adhesive) to the eyes which I then fixed permanently using a small running stitch on my machine as close to the edge of the felt as I could.
 I then pinned the leg pieces to the main body, right sides together. Then sewed down the back of the legs, the in between bit and front of legs of one side, right sides together. I remembered when I had made the elephant that the 'paw pad' circles were sewn on after the leg pieces had been sewn together so I followed the same procedure here.
 I checked that all the seams had been closed securely and then began 'fighting' with the 'paws' to get them into position on the end of the legs.

The larger of my felt circles were too big so I unpicked the tacks and tried the middle sized ones. These were great and so all four were added to the bodies I had just sewn. These were sewn on with the leg material to the top of the two pieces under the foot of the machine and the felt pads on the bottom. Slowly but surely is definitely the motto here!

The body was beginning to look something like!
 I asked if it was alright to add bits onto my dinosaur which weren't on the 'original'. Apparently the young guy I was making the toy for has ADHD so I didn't really want to do something which could affect him. I was informed that this would be ok, so I cut out some scales for the dinosaur's back. I cut two lots as I had done for the paws and eyes so that I could compare colours and see which I liked best.
The dark green felt I had chosen for the paws, also looked good as the scales so I decided to use these.
 Both pieces of felt were sewn together, giving the felt a little more body and stability. At first the machine did not like the felt - see picture right - but with a little tweaking of the tension and stitch length, I managed to get it done
The scales were then pinned to the right side of the neck of one of the body pieces with the scales facing down.
 This done, I started to assemble the dinosaur proper.
 The first part is to sew the tummy bits together, remembering to leave a gap so that you can stuff the animal once it is finished. I have learnt from the two Nellies I have made that to ensure the seam doesn't come undone or rip whilst you are stuffing, double back a couple of times on the start and finish of the two seams either side of the gap.
 The legs need to be pinned out of the way of where the seam is going. Pin them up on the wrong side of the body pieces so that you can sew the seam on the belly correctly. When you are ready to sew, pin the body, right sides together and sew the belly ensuring that you don't catch the folded area in the seam.
I then rearranged the body and pinned it together ready for the final push. The sewing was quite easy but when I came to turn him inside out, I realised that I hadn't left myself a lot of room for stuffing. There were also some places along the tail where the seam was coming undone.
I turned him back inside out and used a small zigzag stitch in the places where the original seam was a little too close to the edge of the materials and had come undone. He was then turned back the right way and stuffed.
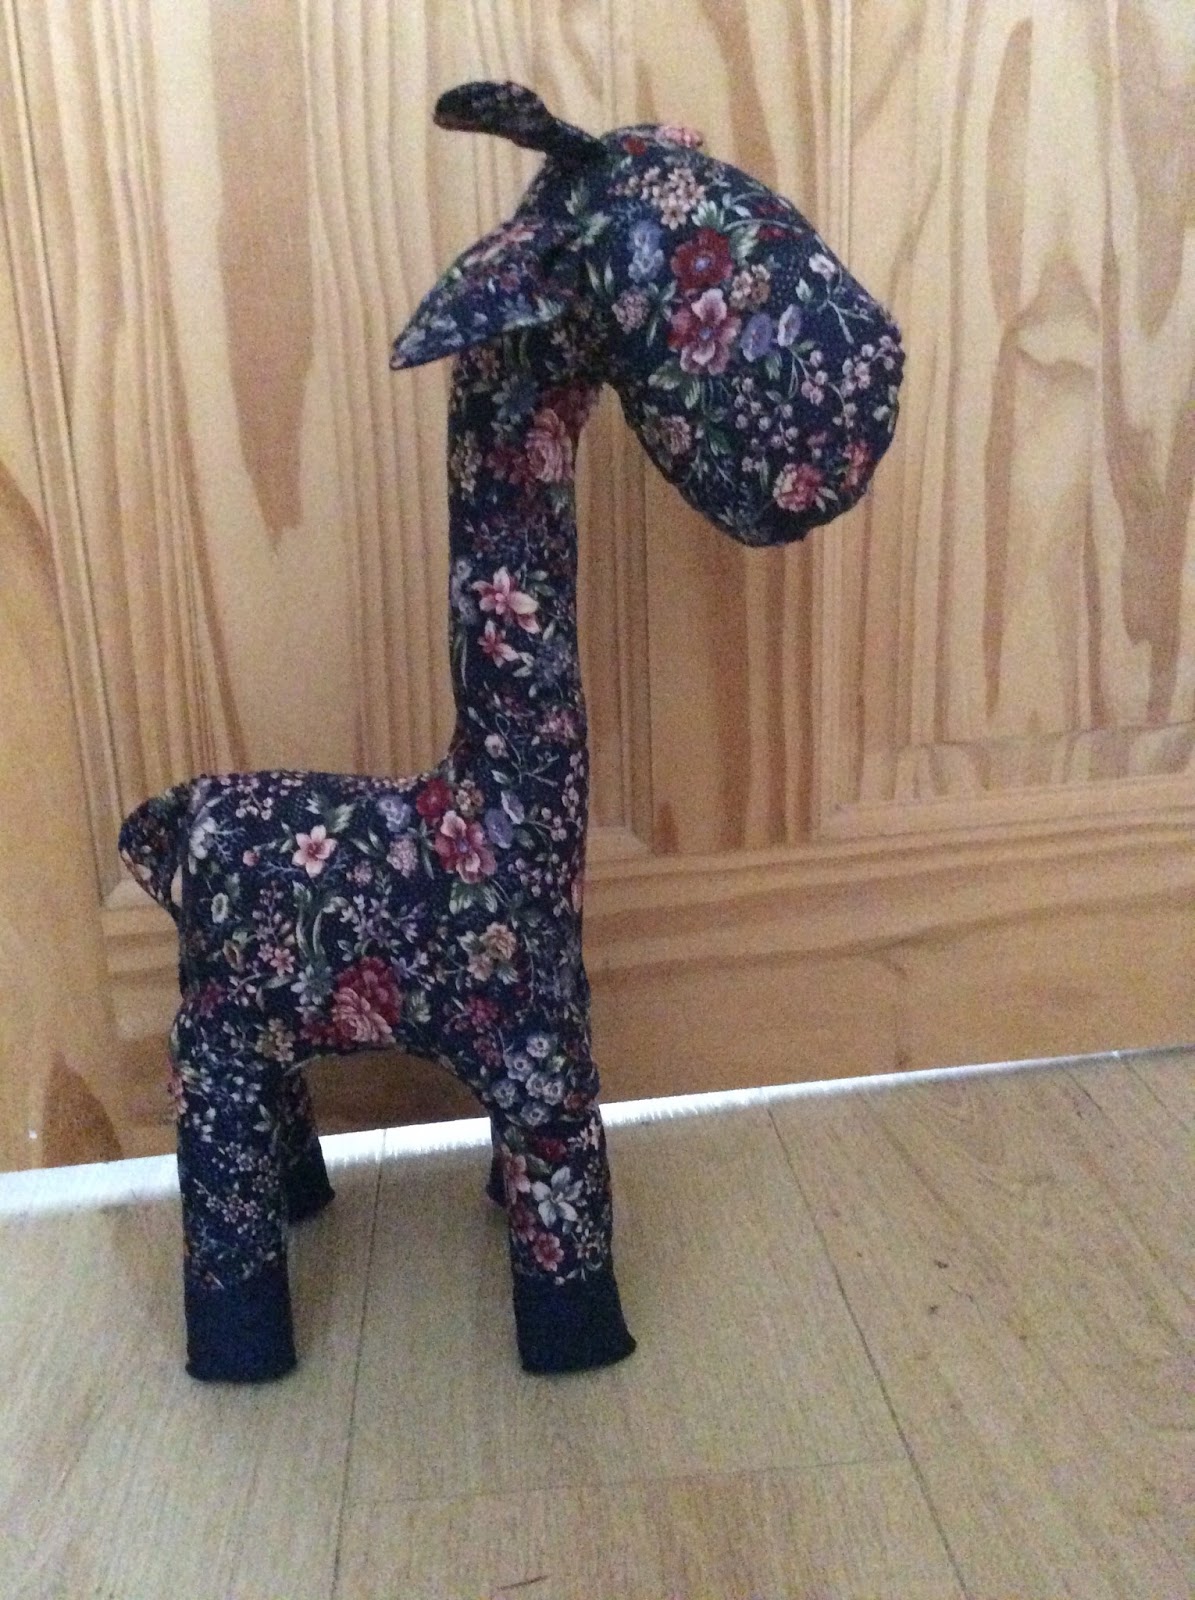
 I am quite pleased with my first attempt and it is the first thing I have made without a pattern.
I can see now that the neck needs to be lifted on the pattern and needs to be smoother between the body and the neck - i.e. straighter without the dip.
I also need to make sure that the seam allowance is the same all the way around - the tail is a little lumpy.
All in all, not a bad first attempt and he will take his place on my recently culled bookshelves. I now need to find some plain blue material and contrasting one for the paws, eyes and scales. Watch this space - coming to a blog near you.............. :0)